MqttCogs is not a published plugin for WordPress….but the code is freely available on github here. This post details how to get started with MqttCogs for WordPress. I’ll give you a really brief overview of how it works and then how to install and configure.
Step 1: Understand How MqttCogs Works
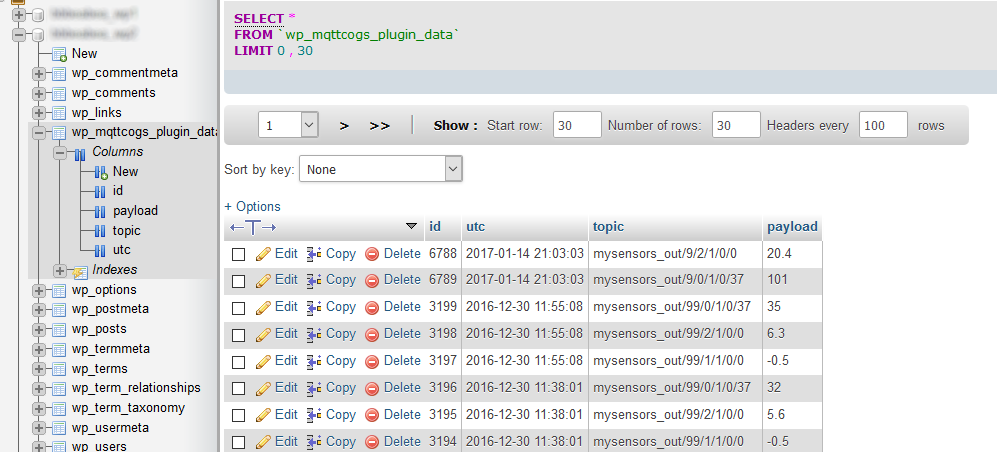
MqttCogs opens a client connection to an Mqtt Broker and listens for messages. When a message arrives it saves it to a database table in WordPress. The table is simple, it looks like this:

MqttCogs provides a number of shortcodes that allow a WordPress user to visualise the data in this table, filter hooks so that you can manipulate the Mqtt data before and after the data is written to the database and some action hooks so that you can ‘do things’ when particular Mqtt message is received.
Oh, and there’s also some simple functions to extract data. Useful if you want to make decisions based on previous data.
So far this is relatively simple!
Under the MqttCogs hood things are more complicated. WordPress (or in fact any) php script is normally only allowed to run for fixed time. The amount of time will be set by your hosting provider. So the ‘opens a connection to an Mqtt Broker’ is difficult. The connection is opened and ‘at some point’ the php script will be killed and the connection lost.
How does MqttCogs get around this problem?
MqttCogs sets up a scheduled event that runs every minute in WordPress. When the event fires MqttCogs checks if still connected. If not it reconnects to the Mqtt broker. However, WordPress scheduled events are a little flaky. Have a read of this article about how to properly set up wordpress cron jobs!
https://tommcfarlin.com/wordpress-cron-jobs/
FYI, I do the above on the MqttCogs site. My cpanel cron job looks like this.

Step 2: Install and Configure MqttCogs
I’m not going to mess around. Here are the instructions.
- Properly configure your wordpress Cron jobs. See the above here
- Install the MqttCogs wordpress plugin.
- Get the plugin from here
- In your wordpress dashboard select Plugins…Add New…Upload Plugin
- Select the zip you dowloaded
- Activate the plugin
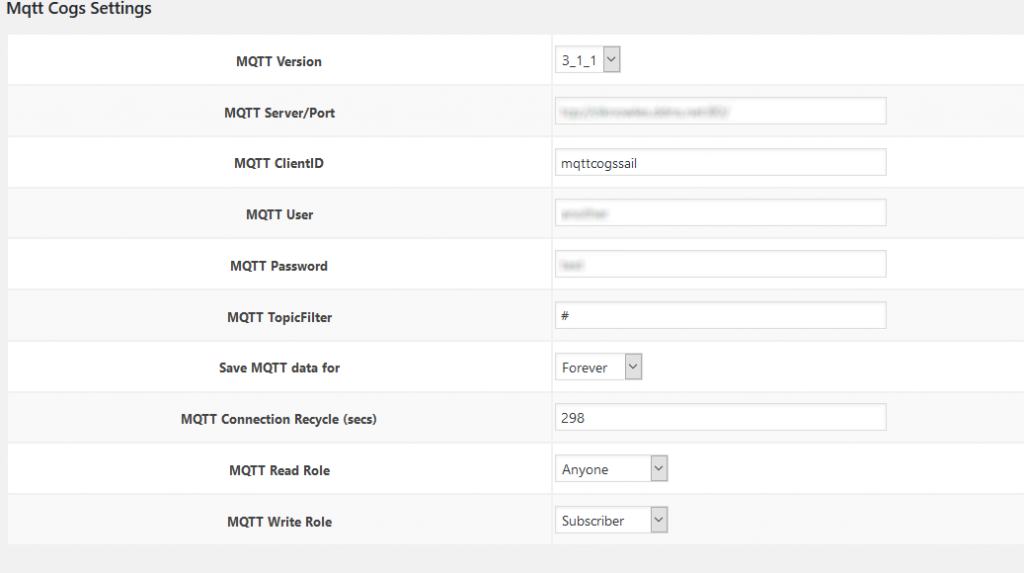
- Go to the MqttCogs settings page and fill in your details for your Mqtt broker etc. I’ve written another post going through each setting here.

Note, the MQTT Server/Port should be in the form tcp://brokerurl:brokerport.
Also, check here for information about connecting using SSL.
Do check that your hosting provider will allow outgoing TCP connections to your destination broker and port!